How to Light your Water Heater
Water Heater systems are currently the most efficient form of hot water distribution. The heated water sits in a multi-gallon tank, and it flows through the plumbing system when someone opens the hot water faucets.
Even though this method worked in residential homes for decades, it still has drawbacks that can inconvenience homeowners. Occasionally, the water in the tank may turn cold if the pilot light goes out unexpectedly.
 Water tanks designed for home use will either have electric or gas warmers. Pilot lights are the small components under gas water heater that prop up a steady blue flame. It is similar to the flame that is constantly burning on a stove or beneath the oven. If this flame goes out, the burner will not be able to distribute heat to the standing water.
Fortunately, this is not a huge problem that a person of average intelligence cannot handle. The task of relighting the water heater is simple if you are good at following directions. Before you start, find a flashlight, screwdriver, and grill lighter with a long nozzle. You may also need a small brush and dustpan to clean the area before you ignite the pilot.
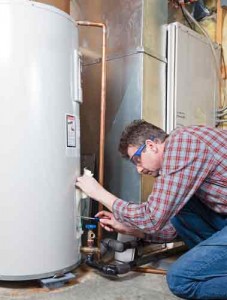
Removing the Panel and Making Preparations
Check the water heater's base for a small rectangular or square panel. Remove this cover so you can gain access to the burner and pilot light. You may be able to snap or slide this panel off, but some units may require a Phillips or flathead screwdriver.
Once the panel is off, use the flashlight to check the area for debris or unfamiliar objects. In some cases, water heater fragments from the tank’s interior may fall on the pilot and extinguish the flame. Clean the area thoroughly and check for any damages or broken parts.
If you happen to smell a gaseous odor, stop the process and call a water heater repair professional. A gaseous smell is the sign of a damaged gas line or broken thermocouple.
In simple terms, a thermocouple sends natural gas to the surface of the pilot. It is a slim distribution pipe fitted with a safety valve on the opening end. This valve will allow gas to pass through when the pilot is lit, but it will close when the flame is not present. No type of vapor should be lingering around if this device is working properly.
Cutting off the Gas and Lighting the Burner Correctly
When the area is clear, cut off the main gas distribution by turning the regulator dial. It should be black or red in color with an OFF setting and PILOT setting. Turn the regulator off, and wait 10 minutes so the gas in the lines can settle and evaporate. If you do not detect any strange fumes or odors, proceed to ignite the pilot with the grill lighter.
If you are lucky, your water heater has a lighter affixed to the exterior. Manufacturers are starting to place this device on newer models as a safety precaution. It should have an identifying label on its surface so you will not confuse it with other buttons or knobs. A copper wire should be running from this button to the surface of the pilot.
Before you light the burner, turn the regulator dial back to the PILOT setting. Beside the dial, you should see a red unmarked button. If you do not see a button, your unit’s regulator dial may also operate as a button.
Press this down to send gas through the thermocouple and onto the pilot’s surface. When you are done, ignite the burner with the affixed striker or grill lighter. If done correctly, you should hear a noise that sounds like sharp wind flowing through a vacuum.
Regulating Flame Temperature and Completing the Task
 The blue flame beneath your water heater should be burning bright. However, it may go out if the thermocouple valve isn’t warm enough to stay open. For assurance, hold down the unmarked distribution button for approximately 60 seconds to raise the valve temperature. This step will prevent the flame from dying out when it goes into an idle state.
Near the gas regulator, you should see a heat control knob which raises and lowers the flame. Turn this knob to the highest position so the water can heat up quickly.
It should take about 60 minutes to reheat every ounce of water in the tank. Reduce the flames after this time period so you can conserve the natural gas flowing to the tank.
Double check your work to make sure everything is operating smoothly. If you are satisfied, firmly place the panel back over the pilot light opening. You should have a small window on the panel or water heater base that will allow you to see the flame. Make sure this window is clear so you can inspect the flame from time to time.
A routine check only takes a few minutes, and it will save you loads of time in the future. If you catch an extinguished flame early, you can ignite the pilot before the water in the tank turns cold.
Let Us Help You Maintain Your Water Heater
Lighting your water heater is pretty simple, but you may need professional assistance if another problem occurs. You should build a relationship with a certified expert because you never know when a water heater repair will be necessary.
We are experienced professionals in the Kitchener, Ontario area, with knowledge that allows us to repair most residential water heaters. For a comprehensive water heater inspection, give Lodder Brothers Limited a call at (226) 780-4462 and schedule an appointment with us today!
